In
11g SOA we don't have anymore the "Timeout" property that
we can put in Web Service invocations to set a maximum wait time in a
sync BPEL invocation - so the solution presented inSetting
a Timeout for a WebService invocation in BPELwill
not work anymore in BPEL 11g.
I will explain below how to set a TIMEOUT on a Web Service invocation when using SOA 11g . This can only be used when only Web Service invocation is made through HTTP.
1. For a process that invokes a Web Service, we want to set a timeout of maximum 10 seconds that the SOA application will wait for the answer. If no response is received within the specified timeout, then we want to catch the timeout error and perform a series of other activities.
The sample below is for a BPEL in a SOA Composite - it will work the same way with Mediator as the timeout is set incomposite.xml file and not in some specific BPEL file .
2. Let's say the SOA composite looks like this:

3.
Click on "Service1" and note that the property inspector
will open in the lower right side of your JDeveloper window. Here set
the property :
oracle.webservices.httpReadTimeout
= 10000
(in MiliSeconds)
If
the Web Service is on the same domain as the SOA Composite , you will
also have to set :oracle.webservices.local.optimization
= false
By
default the local optimization is TRUE and when a SOA composite
invokes another SOA composite within the same Weblogic (WLS) server
or cluster of WLS servers bypasses the whole SOAP stack, and makes a
direct java call to optimize the invocation .

You
may set these properties directly in composite.xml
<reference
name="Service1"
ui:wsdlLocation="http://localhost:8001/soa-infra/services/default/Child!1.0/Child.wsdl">
<interface.wsdl interface="http://xmlns.oracle.com/test/Child/Child#wsdl.interface(Child)"/>
<binding.ws port="http://xmlns.oracle.com/test/Child/Child#wsdl.endpoint(child_client_ep/Child_pt)"
location="http://localhost:8001/soa-infra/services/default/Child!1.0/child_client_ep?WSDL">
<property name="oracle.webservices.local.optimization">false</property>
<property name="oracle.webservices.httpReadTimeout" type="xs:string" many="false">10000</property>
</binding.ws>
</reference>
4. This timeout will throw a RemoteFault - so you can easily add a Catch to your BPEL code to catch this error.
5.Now deploy the composite and run it from EM page . The Web Service we are calling takes 40 seconds to complete , but we set the timeout to 10 seconds - note that the Remote Fault occurs after 10 seconds.


 .
.
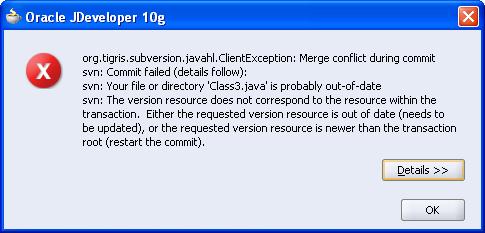
 and the file content will be changed to show both the original content and the content from the repository. The conflicting content will be separated by conflict markers (see
  on the Application Navigator toolbar.